24. HTML E-mail 寄送
24-1 安裝 letter_opener
在本機開發的時候,不需要真的寄出 E-mail,請安裝 letter_opener,這樣 Rails 會在寄信時,自動打開瀏覽器進行預覽。
編輯 Gemfile
  group :development do
    gem 'faker'
+   gem 'letter_opener'
編輯 config/environments/development.rb 設定 delivery_method
+  config.action_mailer.delivery_method = :letter_opener
   config.action_mailer.default_url_options = { :host => 'localhost:3000' }
執行 bundle,重啟伺服器
要測試 E-mail 的一個簡單方式是去測試忘記密碼流程:請登出,然後進入登入畫面,點選 Forgot your password?
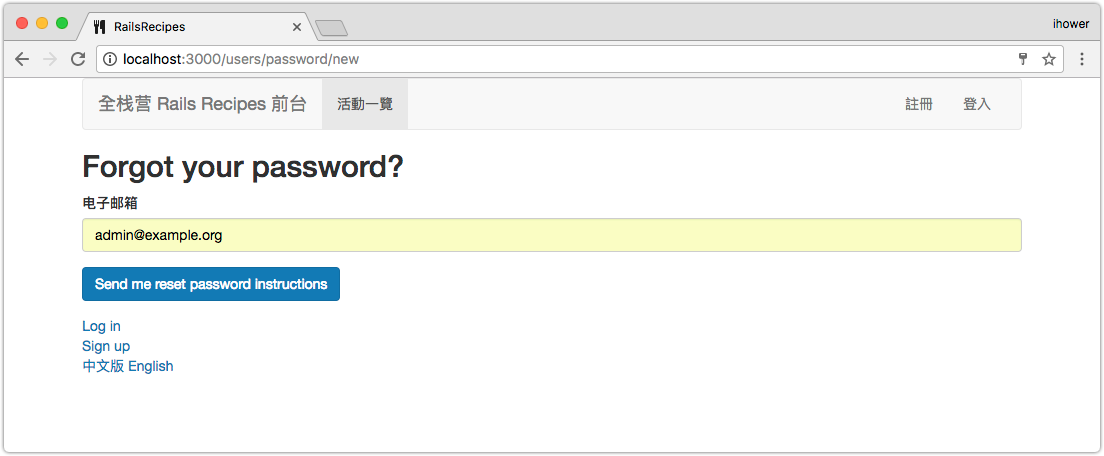
輸入 E-mail 後按下送出,這時候不會真的寄出 E-mail,而是自動跳出瀏覽器瀏覽信件內容:

24-2 寄送報名完成的 E-mail
實作目標:完成報名後,寄出通知 E-mail
執行 rails g mailer notification
編輯 app/mailers/notification_mailer.rb,新增 confirmed_registration 信
  class NotificationMailer < ApplicationMailer

+   def confirmed_registration(registration)
+     @registration = registration
+     @event = registration.event
+
+     mail( :to => @registration.email, :subject =>   I18n.t("notification.subject.confirmed_registration", :name => @event.name) )
+   end

  end
編輯 config/locales/zh-CN.yml 增加 E-mail 標題的翻譯
  "zh-CN":
+   notification:
+     subject:
+       confirmed_registration: "報名成功: %{name}"
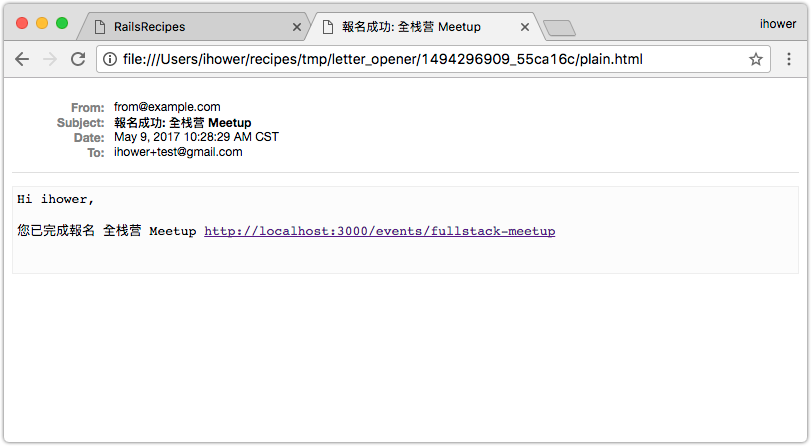
新增 app/views/notification_mailer/confirmed_registration.text.erb 是 E-mail 樣板
Hi <%= @registration.name %>,

您已完成報名 <%= @event.name %> <%= event_url(@event) %>
在 E-mail 裡面的網址都必須要寫絕對網址
xxx_url,而不是相對網址xxx_path。例如event_url(@event)會產生http://localhost:3000/events/fullstack-meetup,而event_path(@event)會產生/events/fullstack-meetup,這樣在 E-mail 閱讀器中點超連結才能順利讓瀏覽器打開網址。那 Rails 要怎麽知道網站位置呢? 我們曾在config/environments/development.rb寫過config.action_mailer.default_url_options = { :host => 'localhost:3000' }這就是 E-mail 中產生xxx_url網址時,會用的網站位置。之後上 production 你也必須在config/environments/production.rb進行設定。
編輯 app/controllers/registrations_controller.rb 在報名完成後寄出 E-mail
  def step3_update
    @registration = @event.registrations.find_by_uuid(params[:id])
    @registration.status = "confirmed"
    @registration.current_step = 3

    if @registration.update(registration_params)
      flash[:notice] = "報名成功"

+     NotificationMailer.confirmed_registration(@registration).deliver_later

      redirect_to event_registration_path(@event, @registration)
    else
      render "step3"
    end
  end
這樣就會在報名完成後,寄出 E-mail 了:
你也可以直接在 rails console 中進行測試:
執行 rails console,然後輸入
NotificationMailer.confirmed_registration( Registration.by_status("confirmed").last ).deliver_now
這樣就會寄出最後一筆報名成功的信,方便我們反復修改 app/views/notification_mailer/confirmed_registration.text.erb 樣板,而不需要離開 rails console,每次改完只要在 rails console 中再寄一次就可以了。
24-3 HTML E-mail
上一節中的 E-mail 樣板,採用的是純文字 text 格式,所以副檔名是 .text.erb。
純文字的 E-mail 好處是排版簡單,不需要煩惱樣式、而且所有的 Email 閱讀器都可以順利打開,不過缺點就是因為沒有 HTML,所以不能放超連結,只能直接放網址 (不過大部分的 E-mail 閱讀器都能判斷這是網址,便會自動幫你加上超連結)、不能放直接放圖片(img)、不能放表格(table)等等。
因此如果想要製作漂亮的 E-mail,就需要製作 HTML 格式的 E-mail,要改成寄出 HTML E-mail 很簡單:
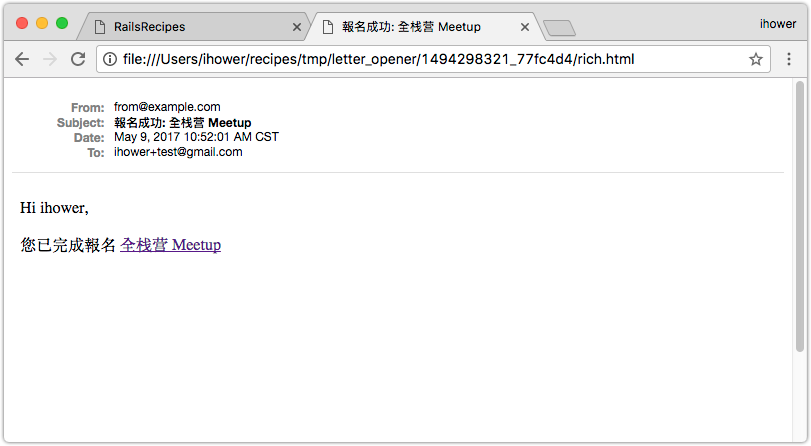
請將 app/views/notification_mailer/confirmed_registration.text.erb 檔名變更為 app/views/notification_mailer/confirmed_registration.html.erb,接著編輯它:
-   Hi <%= @registration.name %>,
+  <p>Hi <%= @registration.name %>,</p>

-  您已完成報名 <%= @event.name %> <%= event_url(@event) %>
+  <p>您已完成報名 <%= link_to @event.name, event_url(@event) %></p>
再測試寄一次,網址的部分就變成超連結了:
Protip: 由用戶觸發的系統信比較適合用 HTML E-mail,用戶會感覺那是系統自動寄出的信件。但如果是客服回信或意見詢問,用純文字 E-mail 可能反而比較有誠意喔。因為用戶會感覺那是人寫的信件,而不是系統自動寄出的信。
24-4 E-mail CSS 樣式問題:安裝 premailer
既然用了 HTML E-mail,接下來會想加一些 CSS 樣式上去。不過這就是麻煩的地方,E-mail 閱讀軟體比起瀏覽器更多樣更古老,例如有 Outlook、iPhone、Apple Mail、Yahoo! Mail、Google Mail、Android、QQ 信箱等等,這些 E-mail 閱讀器對 CSS 的支援程度很不一致。詳情請參考:
- Modern HTML Email Development
- The Ultimate Guide to CSS
-
[CSS Email Design Reference](http://templates.mailchimp.com/development/css/)
基本來說,你不能用 <link> 標籤去加載 CSS 檔案、有些 E-mail 閱讀器不能用 <style> 標籤寫 CSS 樣式,當然也不可能寫 JavaScript。
保險的作法是需要將 CSS 用 Inline (內聯)的方式到 HTML 裡面,例如以下的 HTML:
<link rel="stylesheet" media="all" href="/assets/email.css" />
<style>
  p { color: red }
</style>
<body>
  <p>TEST</p>
</body>
在寄出的 E-mail 中需要改成將 CSS 都集中到該標籤的 style 屬性,這樣 E-mail 閱讀器才會套用到 CSS 樣式。
<body>
  <p style="color: red; font-family: 'Helvetica N=
eue', Helvetica, Arial, sans-serif; font-size: 14px; font-weight: normal;">
</body>
這是一個大苦工啊,更何況寫成 inline CSS 的話,代碼維護性會變成非常差很難改。
好在 Rails 有個 premailer-rails gem 可以幫我們自動做好這個轉換,就可以用本來的寫法,它會自動轉換成 inline CSS 👍👍👍
請編輯 Gemfile
+ gem 'premailer-rails'
執行 bundle,重啟伺服器,下一節我們來套版。
24-5 HTML E-mail 套版
因為 E-mail 的 CSS 屬性支援程度不一,如果要完全自己寫 CSS 測試會很辛苦,好在我們有現成的 Email Responsive Template 樣板可以套:
- Transactional HTML Email Templates
- Really Simple Responsive HTML Email Template
- Responsive HTML Email Templates USD $49
請下載第一個 Transactional HTML Email Templates 的 zip 壓縮檔,我們拿它的 templates/action.html 來改。
你會發現這個他還有提供 inlined 的版本,把 style inline 進去後的 HTML 代碼非常的惡心,很難修改。好在我們有裝
premailer-railsgem 了,所以用不到。
請把 templates/style.css 複製到我們專案中的 app/assets/stylesheets/email.css
編輯 app/views/layouts/mailer.html.erb,把內容全部換成:
<!DOCTYPE html PUBLIC "-//W3C//DTD XHTML 1.0 Transitional//EN" "http://www.w3.org/TR/xhtml1/DTD/xhtml1-transitional.dtd">
<html xmlns="http://www.w3.org/1999/xhtml">
<head>
<meta name="viewport" content="width=device-width" />
<meta http-equiv="Content-Type" content="text/html; charset=UTF-8" />
<title>Notification</title>
<link href="email.css" media="all" rel="stylesheet" type="text/css" />
</head>
<body itemscope itemtype="http://schema.org/EmailMessage">
<table class="body-wrap">
<tr>
<td></td>
<td class="container" width="600">
<div class="content">
<table class="main" width="100%" cellpadding="0" cellspacing="0" itemprop="action" itemscope itemtype="http://schema.org/ConfirmAction">
<tr>
<td class="content-wrap">
<meta itemprop="name" content="Confirm Email"/>
<table width="100%" cellpadding="0" cellspacing="0">
<tr>
<td class="content-block">
<%= yield %>
</td>
</tr>
<tr>
<td class="content-block" itemprop="handler" itemscope itemtype="http://schema.org/HttpActionHandler">
<%= yield :action %>
</td>
</tr>
<tr>
<td class="content-block">
— 你的名字
</td>
</tr>
</table>
</td>
</tr>
</table>
<div class="footer">
<table width="100%">
<tr>
<td class="aligncenter content-block"><a href="https://ihower.tw/rails/">Rails 實戰聖經</a></td>
</tr>
</table>
</div></div>
</td>
<td></td>
</tr>
</table>
</body>
</html>
其中主內容是 <%= yield %>,另外還挖了一個洞是 <%= yield :action %>,等會用 content_for :action 可以填內容進去。
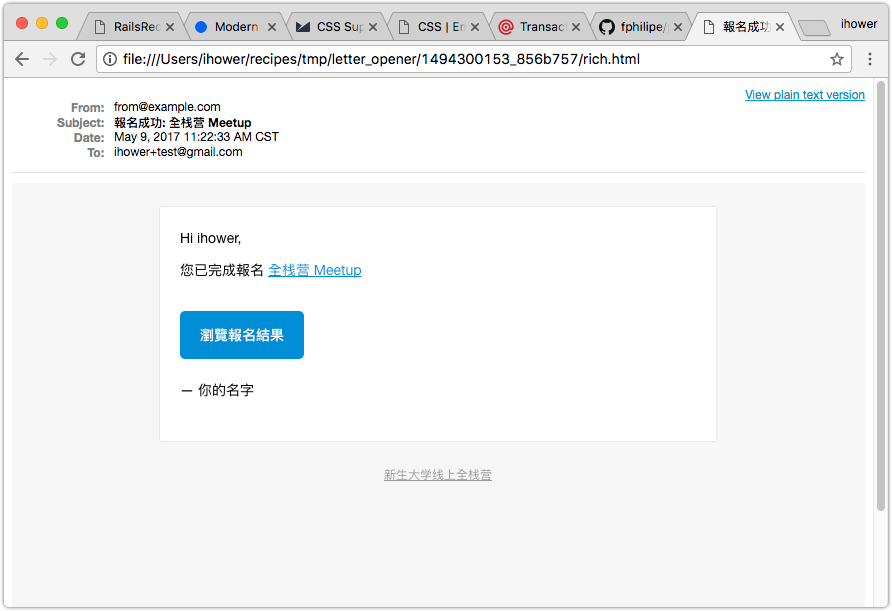
編輯 app/views/notification_mailer/confirmed_registration.html.erb
   <p>Hi <%= @registration.name %>,</p>

   <p>您已完成報名 <%= link_to @event.name, event_url(@event) %></p>

+  <% content_for :action do %>
+    <%= link_to "瀏覽報名結果", event_registration_url(@event, @registration), :class => "btn-primary", :itemprop => "url" %>
+  <% end %>
多加了一個用途是 Call to Action 的按鈕,這樣一封漂亮的 E-mail 就完成了。