3. 建立 API 伺服器
3-1 目標
要實作一個訂票系統 API 伺服器,可以提供給手機 iOS, Android 應用程式,或是一個開放平臺給別的開發者串接使用。
功能包括:
- 可以查詢有哪些列車
- 可以查詢特定列車有哪些空位
- 可以訂票,並得到一組訂票號碼(亂數產生)
- 根據訂票號碼,可以查詢訂票資料
- 根據訂票號碼,可以修改訂票資料
- 根據訂票號碼,可以取消訂票
Models 會有 Train 和 Reservation。
根據上述的需求,我們需要設計對應的 Web API,首先需要決定網址和 HTTP 方法:
GET /trainsGET /trains/{列車編號}GET /reservations/{訂票號碼}POST /reservations/{訂票號碼}PATCH /reservations/{訂票號碼}DELETE /reservations/{訂票號碼}
3-2 什麽是 REST API
在 Rails 的路由中,我們已經學過 RESTful 的概念:
- GET 讀取資料
- POST 新增資料
- PATCH 修改資料
- DELETE 刪除資料
在設計Web API 的時候,我們也是用一樣的大原則進行設計,這種設計原則就叫做REST:圍繞在Model(在REST中叫做Resource 資源)來建構CRUD 的操作,其中網址會是名詞,用不同的HTTP 方法來區分CRUD 操作。
不過,有時候有些操作也不完全是 CRUD 的概念,例如批次更新的操作,可能就會設計成
POST /topics/bulk_update
這種風格叫做 RPC(remote procedure call: 遠端程序呼叫),網址是動詞,POST 表示呼叫。
又例如訂閱可以有兩種設計風格,第一種是 REST 風格,
POST /topics/{topic_id}/subscription 和 DELETE /topics/{topic_id}/subscription/{id}
其中 subscription 是名詞,用 POST 表示新增、用 DELETE 表示刪除。
或第二種 RPC (remote procedure call: 遠端程序呼叫) 風格:
POST /topics/{topic_id}/subscribe 和 POST /topics/{topic_id}/unsubscribe
subscribe 和 unsubscribe 是動詞,用 POST 表示執行。
RPC 風格也是常見的設計,目前設計 Web API 的主流是以 REST 風格為主。但無論是 REST 或 RPC 風格,*切記 HTTP GET 和 POST 方法不能用錯:GET 只能單純讀取資料,不應該修改資料。而 POST 則是執行某個操作,會修改到伺服器的資料。
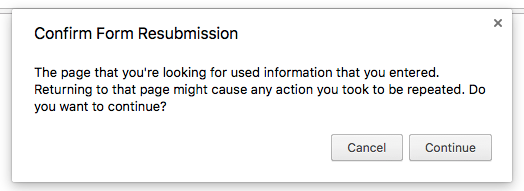
這是因為互聯網都會假設 GET 是可以重復讀取並快取的,而 POST 不行。因此搜尋引擎只會用 GET 抓資料,像這篇文章就鬧了笑話,這個人用 GET 來刪除資料,造成Google 爬蟲一爬就不小心刪除了,他還以為是 Google 故意駭他…lol 另外,像瀏覽器的表單送出是用POST,如果我們在action 中不redirect (也就是讓瀏覽器去GET 另一頁),而是直接render 返回,那麽如果用戶重新整理畫面的話,瀏覽器會跳出以下的警告視窗,要求用戶確認是否再POST 一次,因為這可能會造成重復操作(重復新增)。如果是 GET 的話,重新整理就不會有這種警告了。
3-3 建立 Models
執行 rails g model train
修改 db/migrate/201703XXXXXXXX_create_trains.rb
 class CreateTrains < ActiveRecord::Migration[5.0]
   def change
     create_table :trains do |t|
+      t.string :number, :index => true # 列車號碼
       t.timestamps
     end
   end
 end
執行 rails g model reservation
修改 db/migrate/201703XXXXXXXX_create_reservations.rb
 class CreateReservations < ActiveRecord::Migration[5.0]
   def change
     create_table :reservations do |t|
+      t.string :booking_code, :index => true
+      t.integer :train_id, :index => true
+      t.string :seat_number, :index => true # 座位號碼
+      t.integer :user_id, :index => true
+      t.string :customer_name
+      t.string :customer_phone
       t.timestamps
     end
   end
 end
執行 rake db:migrate 建立數據表。
修改 app/models/train.rb 加上關聯和資料驗證,以及一個 available_seats 方法回傳可以被預訂的座位號碼:
   class Train < ApplicationRecord
+    validates_presence_of :number
+    has_many :reservations
+
+    def available_seats
+      # TODO: 回傳有空的座位,這裡先暫時固定回傳一個陣列,等會再來處理
+      ["1A", "1B", "1C", "1D", "1F"]
+    end
   end
以及修改 app/models/reservation.rb 針對每筆 Reservation 在新建的時候,亂數產生一個 booking_code 這是訂票號碼,訂好票之後,可以用這個號碼來做修改或取消訂票:
 class Reservation < ApplicationRecord
+  validates_presence_of :train_id, :seat_number, :booking_code
+  validates_uniqueness_of :seat_number, :scope => :train_id
+
+  belongs_to :train
+
+  before_validation :generate_booking_code, :on => :create
+
+  def generate_booking_code
+    self.booking_code = SecureRandom.uuid
+  end
 end
編輯 db/seeds.rb 加入種子資料:
Train.create!( :number => "0822")
Train.create!( :number => "0603")
Train.create!( :number => "0826")
Train.create!( :number => "0642")
執行 rake db:seed 就有這些種子列車資料了。
3-4 配置路由
根據上述的 API 設計,我們來設置 config/routes.rb:
 Rails.application.routes.draw do
+ namespace :api, :defaults => { :format => :json } do
+   namespace :v1 do
+     get "/trains"  => "trains#index", :as => :trains
+     get "/trains/:train_number" => "trains#show", :as => :train
+
+     get "/reservations/:booking_code" => "reservations#show", :as => :reservation
+     post "/reservations" => "reservations#create", :as => :create_reservations
+     patch "/reservations/:booking_code" => "reservations#update", :as => :update_reservation
+     delete "/reservations/:booking_code" => "reservations#destroy", :as => :cancel_reservation
+   end
+ end

 # (略)
 end
其中兩層的namespace 會讓網址前增加/api/v1/、Controller 的目錄多兩層放在app/controllers/api/v1/ 下、Controller 類的名字前面增加Api::V1 ,變成Api::V1::ReservationsController、路由方法變成api_v1_XXXXX_path 和api_v1_XXXXX_url
而其中post "/reservations" => "reservations#create", :as => :create_reservations的意思是
客戶端送出 POST /api/v1/reservations 時,會進入 Api::V1::ReservationsController 的 create 方法,而 as 參數的意思是產生這個地址的路由方法叫做 api_v1_create_reservations_path。
最後,:defaults => { :format => :json } 意思是預設客戶端要求的是 JSON 格式,本來的預設值是 HTML。如果沒有改這個的話,你必須在網址最後面加上 .json 來指定客戶端要求的格式,例如 GET /api/v1/trains.json。
3-5 產生 Api controller
接著來製作 Controller,首先產生 ApiController。在 Terminal 輸入:
rails g controller api --no-assets
修改 app/controllers/api_controller.rb
- class ApiController < ApplicationController
+ class ApiController < ActionController::Base
+   skip_before_action :verify_authenticity_token
end
我們會把 API 用途的 controller 都繼承自 ApiController,而不是 ApplicationController。這是因為 API 場景不需要 CSRF 瀏覽器安全檢查機制。什麼是 CSRF 詳見Rails 網站安全這章的說明。
Rails 5.2 之後預設打開了 CSRF 瀏覽器安全檢查機制,因此這裡用
skip_before_action :verify_authenticity_token特別關掉它。Rails 6 之前,則是在 ApplicationController 之中放了protect_from_forgery with: :exception打開這個檢查。
3-6 實作 GET /trains
執行
rails g controller api::v1::trains –no-assets
編輯 app/controller/api/v1/trains_controller.rb
- class Api::V1::TrainsController < ApplicationController
+ class Api::V1::TrainsController < ApiController

+  def index
+    @trains = Train.all
+    render :json => {
+      :data => @trains.map{ |train|
+        { :number => train.number,
+            :train_url => api_v1_train_url(train.number)
+        }
+      }
+    }
+  end
+
+  def show
+    @train = Train.find_by_number!( params[:train_number] )
+
+    render :json => {
+      :number => @train.number,
+      :available_seats => @train.available_seats
+    }
+  end

 end
其中 render :json => 某個變數 的語法,會把變數轉成 JSON 字串輸出。這裡也不需要準備 View .erb 檔案。
因為這兩個 API 都是用 HTTP GET 讀取,我們可以直接打開瀏覽器,瀏覽 http://localhost:3000/api/v1/trains 就是用 GET 讀取資料。
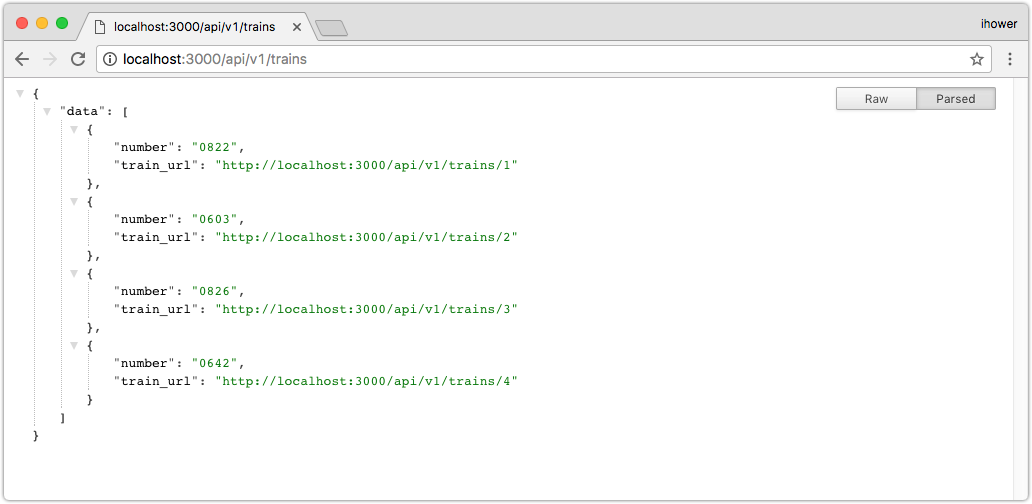
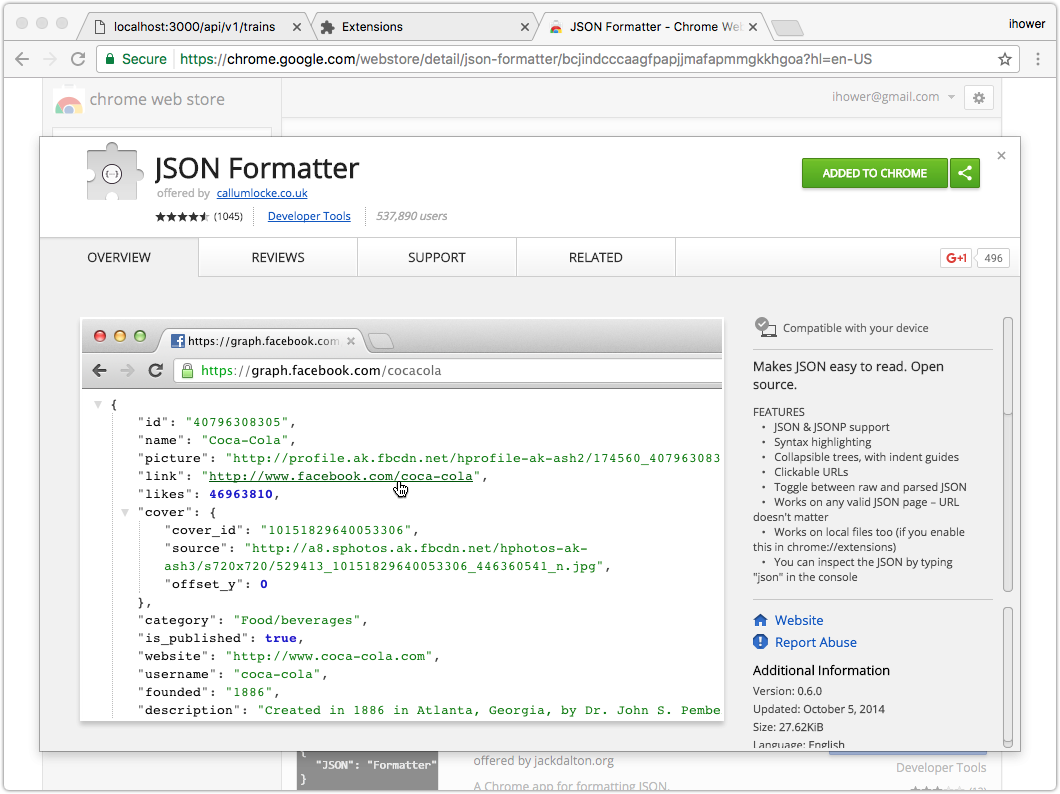
請先裝 Chrome extension JSON Formatter,就會有排版整齊的輸出。
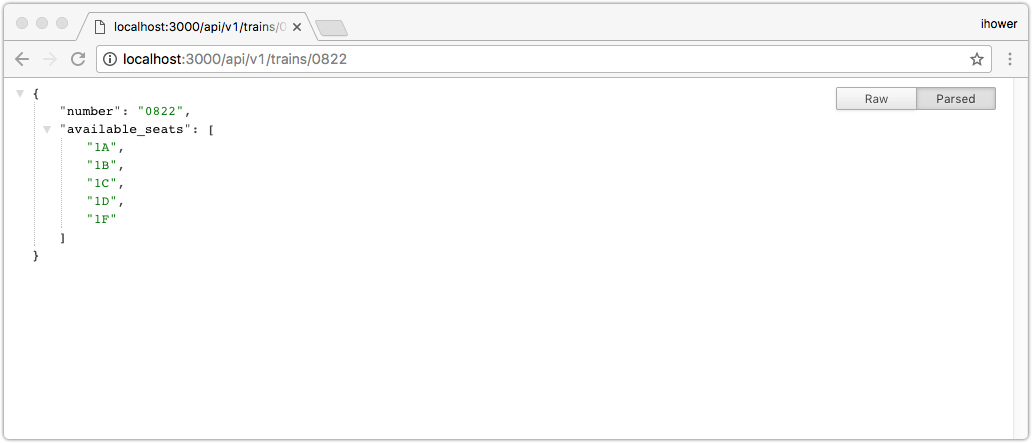
瀏覽其中一筆列車的話 http://localhost:3000/api/v1/trains/0822
你也可以用 Postman 來看:
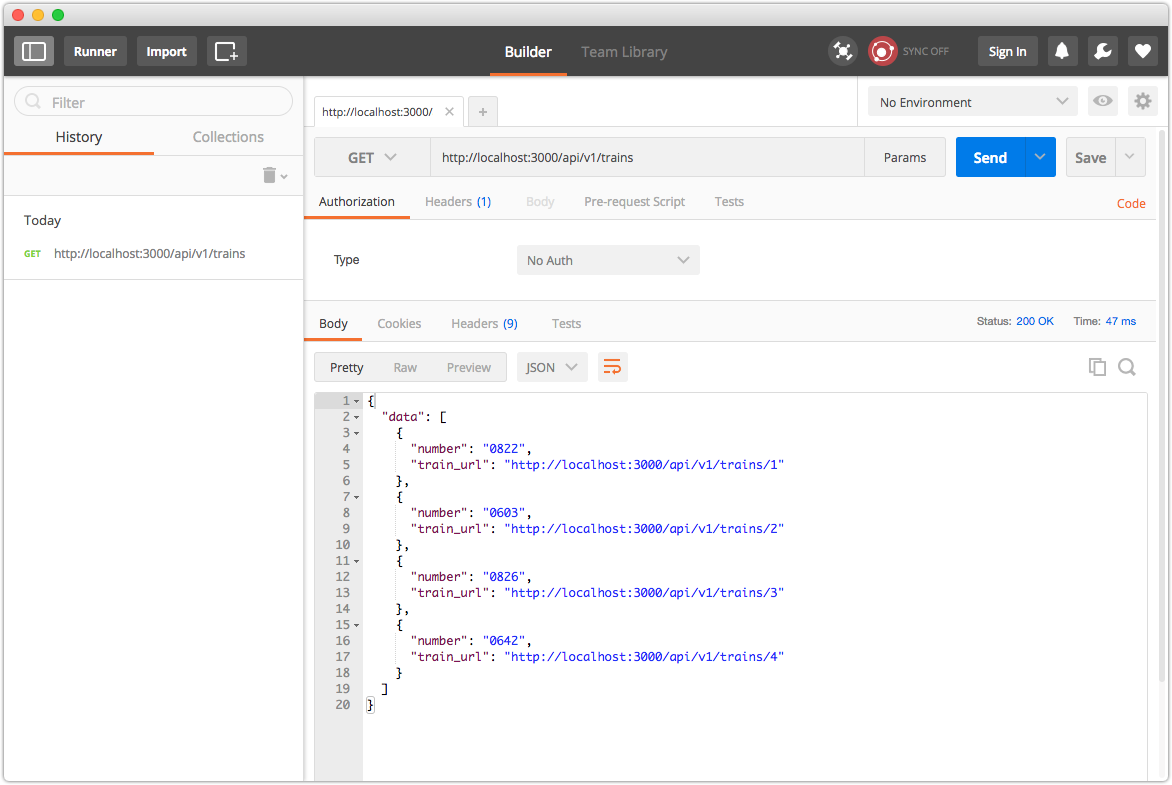
如果程序出錯的話,在Postman會看到HTML原始碼,反而很難看出錯誤的地方,這個時候可以再點 Preview 就能看到錯誤網頁,或者是回到 Terminal 看伺服器的 log。
3-7 實作 reservations 定位
接下來實作訂位:
執行 rails g controller api::v1::reservations --no-assets
編輯 app/controller/api/v1/reservations_controller.rb
- class Api::V1::ReservationsController < ApplicationController
+ class Api::V1::ReservationsController < ApiController

+  def create
+    @train = Train.find_by_number!( params[:train_number] )
+    @reservation = Reservation.new( :train_id => @train.id,
+                                    :seat_number => params[:seat_number],
+                                    :customer_name => params[:customer_name],
+                                    :customer_phone => params[:customer_phone] )
+
+    if @reservation.save
+      render :json => { :booking_code => @reservation.booking_code,
+                        :reservation_url => api_v1_reservation_url(@reservation.booking_code) }
+    else
+      render :json => { :message => "訂票失敗", :errors => @reservation.errors }, :status => 400
+    end
+  end

end
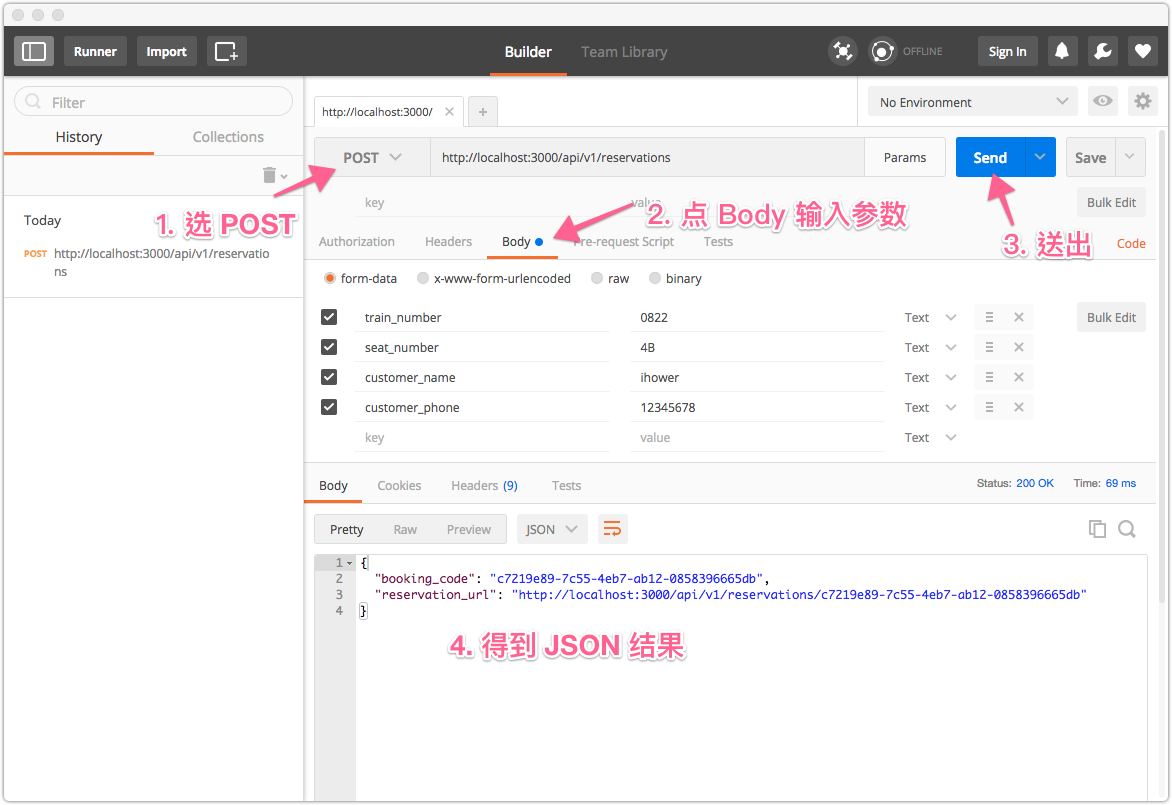
這樣就完成了,要怎麽測試呢? 如果直接瀏覽 http://localhost:3000/api/v1/reservations 的話,瀏覽器會用 GET 而不是 POST,這時候必須用 Postman 的表單進行測試,輸入網址,方法選 POST,在 Body 中輸入參數,按下送出之後,得到下麵的結果就表示完成了:
3-8 完成其他部分
接下來讓我們在 Api::V1::ReservationsController 完成其他 API:
查詢
+ def show
+   @reservation = Reservation.find_by_booking_code!( params[:booking_code] )
+
+   render :json => {
+     :booking_code => @reservation.booking_code,
+     :train_number => @reservation.train.number,
+     :seat_number => @reservation.seat_number,
+     :customer_name => @reservation.customer_name,
+     :customer_phone => @reservation.customer_phone
+   }
+ end
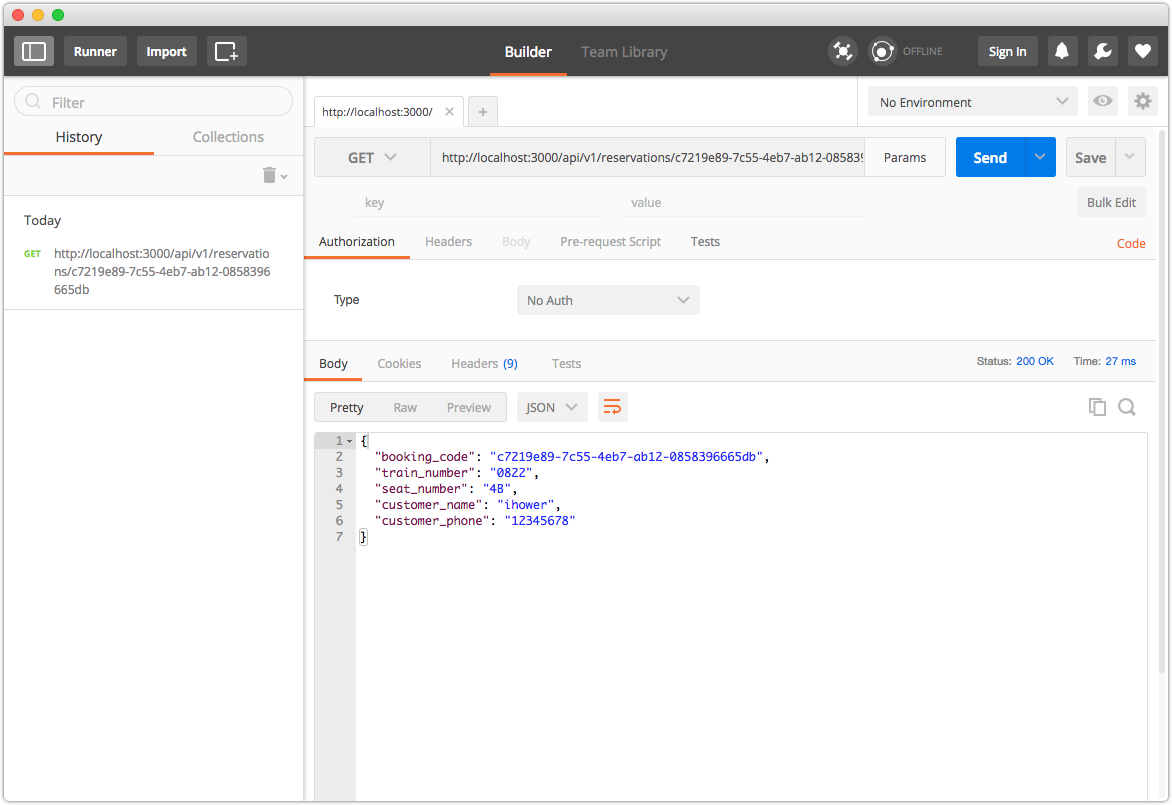
用 Postman 測試,用 GET http://localhost:3000/api/v1/reservations/訂票號碼
修改
+ def update
+   @reservation = Reservation.find_by_booking_code!( params[:booking_code] )
+   @reservation.update( :customer_name => params[:customer_name],
+                        :customer_phone => params[:customer_phone] )

+   render :json => { :message => "更新成功" }
+ end
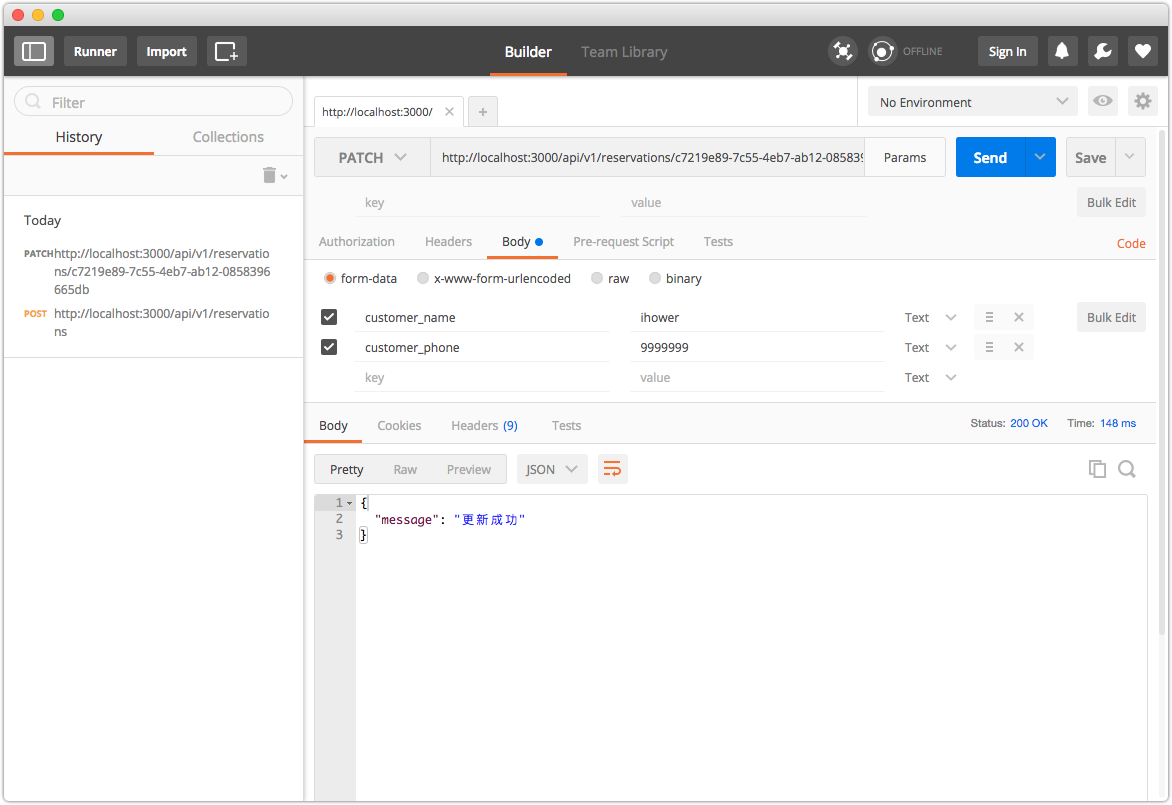
用 Postman 測試,用 PATCH http://localhost:3000/api/v1/reservations/訂票號碼
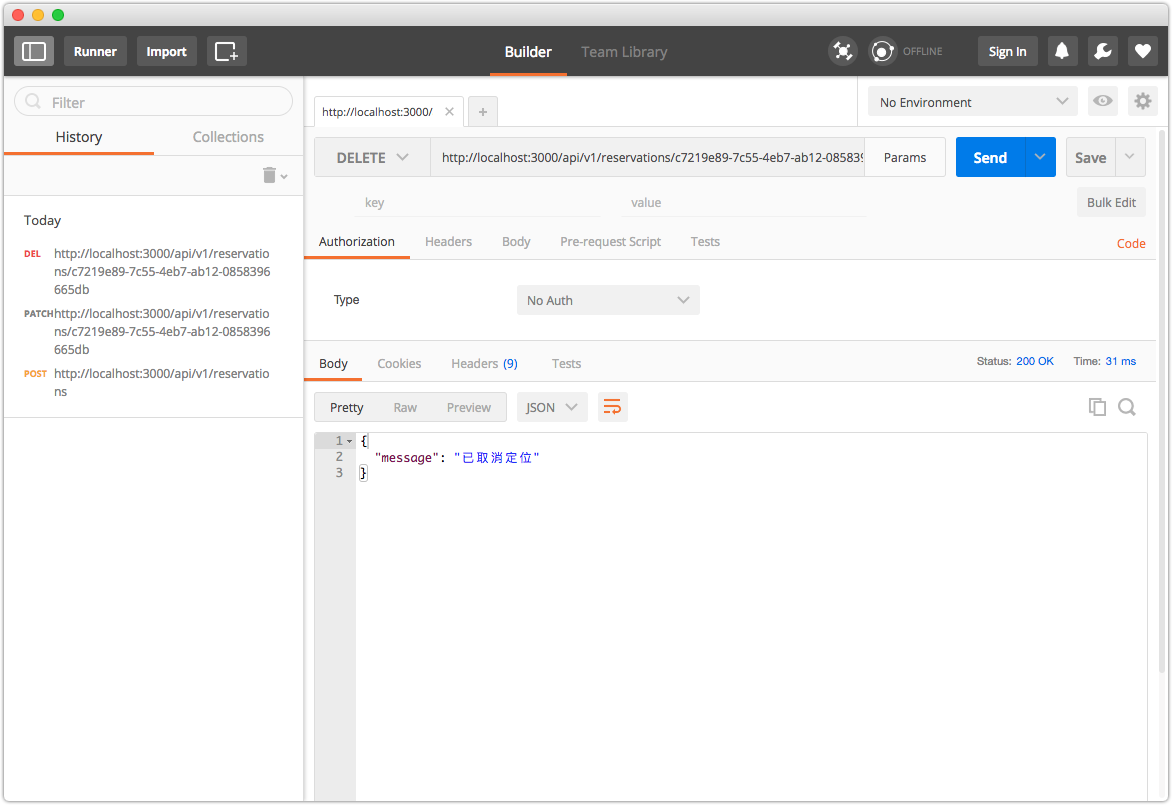
取消
+ def destroy
+   @reservation = Reservation.find_by_booking_code!( params[:booking_code] )
+   @reservation.destroy

+   render :json => { :message => "已取消定位" }
+ end
用 Postman 測試,用 DELETE http://localhost:3000/api/v1/reservations/訂票號碼
完成 Train#availale_seats 方法
在前述步驟中的 Train#available_seats 讓我們完成它:
 class Train < ApplicationRecord

   validates_presence_of :number
   has_many :reservations

+  # 產生所有位置從 1A~6C
+  # ["1A", "1B", "1C", "2A", "2B", "2C", "3A", "3B", "3C",
+  #  "4A", "4B", "4C", "5A", "5B", "5C", "6A", "6B", "6C"]
+  SEATS = begin
+    (1..6).to_a.map do |series|
+      ["A","B","C"].map do |letter|
+       "#{series}#{letter}"
+      end
+    end
+  end.flatten

   def available_seats
-    # TODO: 回傳有空的座位,這裡先暫時固定回傳一個陣列,等會再來處理
-    ["1A", "1B", "1C", "1D", "1F"]

+    # 所有 SEATS 扣掉已經訂位的資料
+    return SEATS - self.reservations.pluck(:seat_number)
   end

 end
3-9 解說
以下補充說明設計的緣由:
HTTP response code
HTTP 的 response 都會有一個 HTTP 狀態碼,最基本常見會用到的有:
- 200 成功(這是預設值)
- 400 客戶端參數錯誤,例如資料驗證失敗,必填的資料沒有填等等
- 401 Unauthorized 要求登入
- 403 有登入但是權限不夠
- 404 找無此資源
- 500 伺服器錯誤
例如我們在訂位失敗的時候,多指定了 :status => 400
拆開 URL 和 controller
在路由中我們使用了 namespace :api 和 namespace :v1,讓 API 使用的 controller,和網頁用戶的 controller 拆開,網址用 api/v1 也表示這是 API 專用的版本。
原因是
- API 的操作流程,和網頁用戶的操作流程是迥異的,拆開來有助於維護
api/v1是因為需要保持向下相容性。我們不能隨意變更 API 格式,不然客戶端的程序會壞掉。不像 Web 程式可以隨時升級,行動裝置的 App 上架需要時間,因此需要保持 API 的向下相容性。
怎樣叫做破壞向下相容的變更呢? 例如修改網址、修改 JSON key 的名稱、變更 value 的型態等等。如果只是新增 key 是相容的。也因此不是每次有改 API 一定都需要遞增版本。只有破壞性的變更才需要改成 v2。
router.rb 寫法
我們也可以改用大家原本熟悉的 resources 寫法:
namespace :api, :defaults => { :format => :json } do
  namespace :v1 do
    resources :trains, :only => [:index, :show]
    resources :reservations, :ony => [:show, :create, :update, :destroy]
  end
end
不過,resources 寫法是 Rails 獨有的,因此在撰寫 API 說明文件的時候,我們會逐條每個 API 都列出來,這樣跟我們合作的 iOS 、Android 工程師或第三方工程師才看得懂怎麽呼叫 Web API。